Review: iPhone
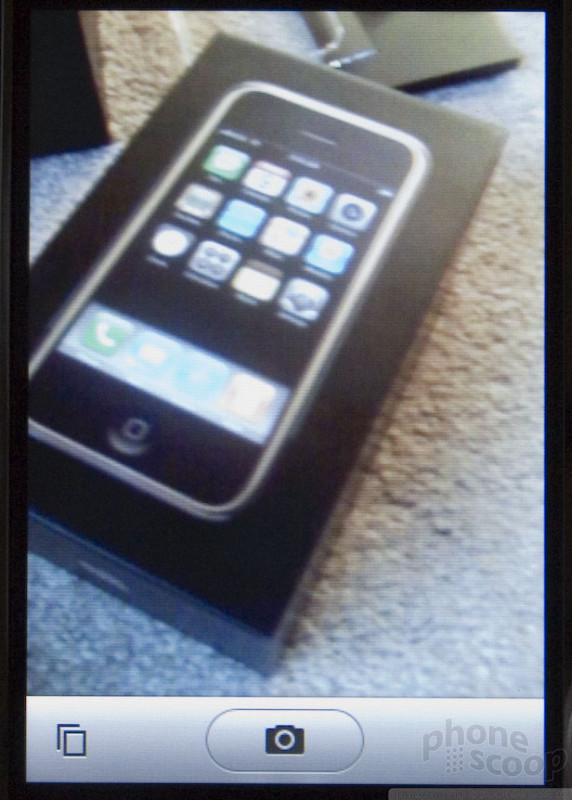
We have not gushed about anything up until now, but never has there been such a simple, fast, intuitive camera application in a phone. Hitting the camera icon launches the viewfinder immediately. There are only two buttons: a fairly large shutter key, and a much smaller button to take you to the "camera roll" (photo gallery of camera snapshots).
The viewfinder is smooth and updates constantly. It uses the orientation sensor to automatically figure out which way the phone is being held and rotate the photo to the correct orientation when the photo is saved. The iPhone subtly lets you know it is aware of this by rotating the camera icon on the shutter button. The sensor is used for both taking and viewing photos, so no matter how you hold it, your photos are always right-side-up, even if you took them upside-down.
When you hit the shutter button, the picture is snapped and saved immediately as long as there is ample light. It is so fast that the only explanation we can come up with is that the iPhone is actually caching the image from the viewfinder waiting for you to snap a picture. When using the camera in low light, there's a delay of a little over a second before the picture is snapped, however it is saved immediately.
Once a picture is saved you are immediately returned to the viewfinder. If you are taking lots of pictures but want to save battery power between shots, you can use the sleep button to suspend the camera, and return to it by waking the iPhone back up with little to no delay.
Pictures taken in daylight are remarkably bright and accurate in most cases. Pictures taken in low light are a little hit-or-miss, but surprisingly good considering the iPhone has a fixed-focus lens and lacks any sort of flash. See sample photos below.
The automatic exposure (brightness) control works quickly and accurately, but you're at its mercy if the scene includes both very bright objects (like the sky) plus areas in shadow. It has no way of knowing which should be exposed properly, so it averages. This means you can only control brightness by how you frame the shot. Once you realize this, it's pretty easy to just move it around until it looks right. You can always crop it later on your PC. See the examples below where a too-dark shot was corrected by aiming so the area in shadow filled more of the screen:
The iPhone camera has a fixed-focus lens and no macro switch, so close-up shots are always out-of-focus.
Like exposure, the white balance is completely automatic. The vast majority of the photos we took had excellent white balance - some of the best we've seen from a camera phone. It didn't get it right 100% of the time, though. See the example shots below, taken 30 seconds apart, just before sunset:
We also ran into a definite bug of some sort. Shooting through a dirty glass window on the top floor of a nearby high-rise, the camera basically went beserk and starting taking psychedelic photos and even some upside-down. Everything looked fine in the live viewfinder, but the automatic brief review between shots showed us that we were taking bad photos. Turning the iPhone off and on again fixed the problem easily enough.
Gallery
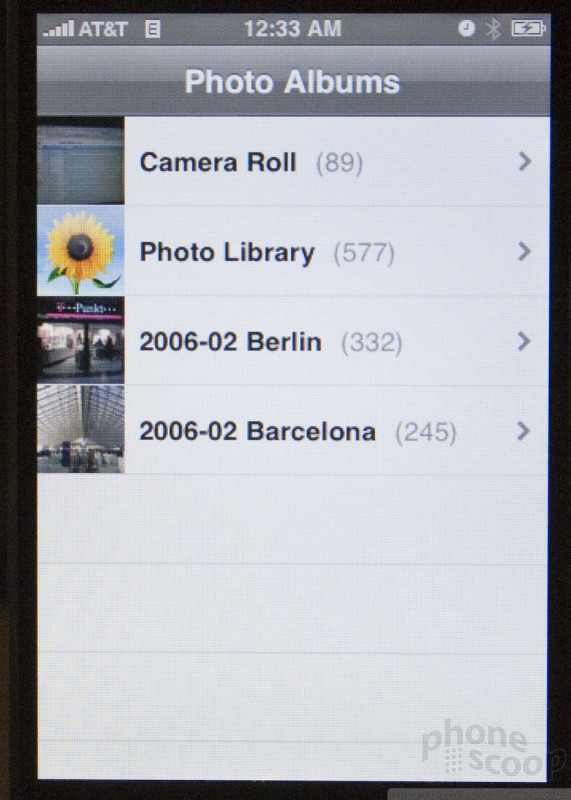
The photo gallery offers a list of photo albums both taken by the phone as well as synced from your computer. Each album displays its pictures as a grid of thumbnails. You can view a single picture individually and manually move forward or back just by "flicking" to the left or right, or you can play an album as a slide show, complete with transitions.
You can email a picture, but they are downsized to VGA when mailed off. You can also set a picture to your wallpaper or assign it to a contact.






 CES 2007 + iPhone
 iPhone 15 Series Goes All-In on USB-C and Dynamic Island
 JBL Brings Smart Charging Case to More Earbud Styles
 iOS 18 Overhauls Home Screen, Messaging, Photos
 T-Mobile Tests Wireless Emergency Alert Via Satellite
 Apple iPhone

